Monday, October 21, 2013

what I've been up to lately...

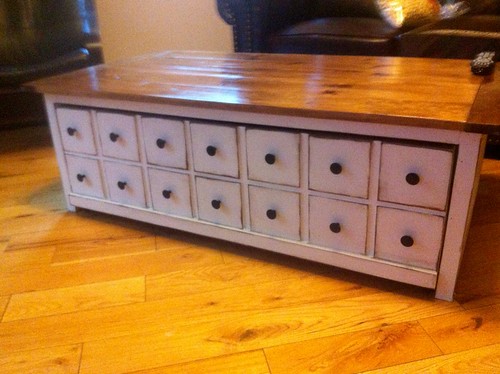
Well, all the major renovations aside from bathrooms and outside porches have been completed thanks to my wonderful husband who's stuck by me when I just wanted to pull out my hair and his. That's not to say that there isn't work to be done just now it's my time to shine. I love to decorate and keep a tidy house but lets be realistic - since having children my house isn't as spotless as I'd like it and truth be told  I'd rather do something that doesn't get undone. So onto my project. Dh's mother's bday was at the end of August and our gift to her was a new coffee table for her living room. Using Ana whites plans I built this lovely table but there was one flaw in the plans - that the trudle box (short sides) should be shorter in length by the actual size of your 2x2 (this one protruded the depth of the 2x2). I ended up using colonial american stain for the table top and 3 coats of semi-gloss poly then I primed and painted the bottom in white with distressing to the faux fronts using a stain pen.

IMG_1245

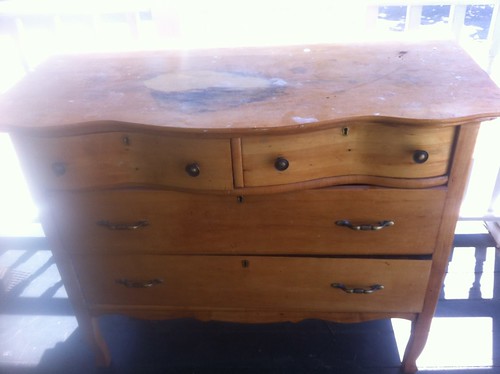
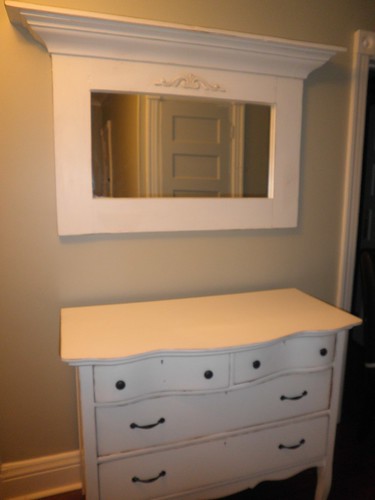
I also finish my $20 dresser find that I got at a yard sale last year. When I brought it home dh asked me why I was buying junk. 

IMG_0784

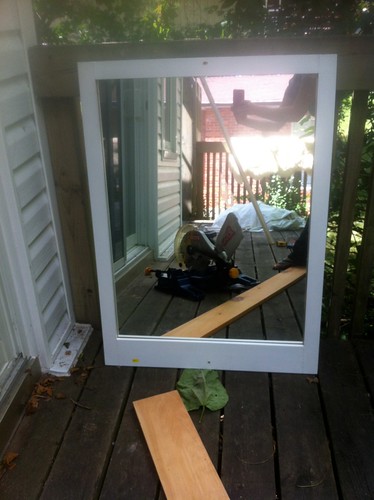
So I went shopping for some more junk and bought this mirror for $2

IMG_0916

And together I turned them into this for a total cost of $50 in supplies (I used the crown and wood for the mirror from my scrap wood pile) I still have to decorate it but I'm planning on making my own picture frames and nick-nacs for it so this is going to have to wait for the time being

PA130003

PA110107
I also ended up sewing the jalie 2908 pattern that pr member rave about and I got to tell you that I love it. Now all I have to do is invest in  some good quality rivets because I'm not sure I will ever buy a pair of jeans again!

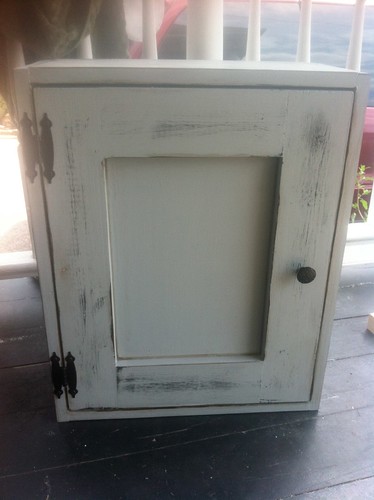
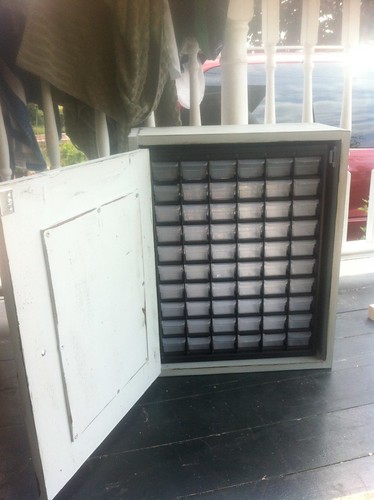
Here's a storage cabinet for my little notions which hides the fugly part storage box.
IMG_1063

IMG_1064

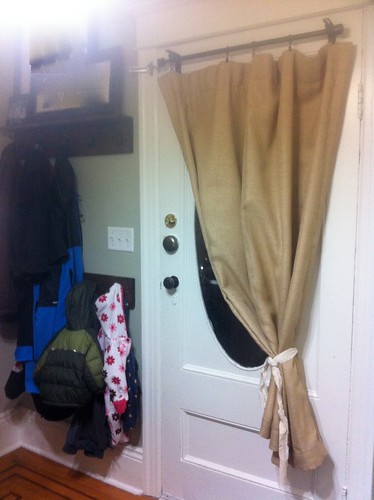
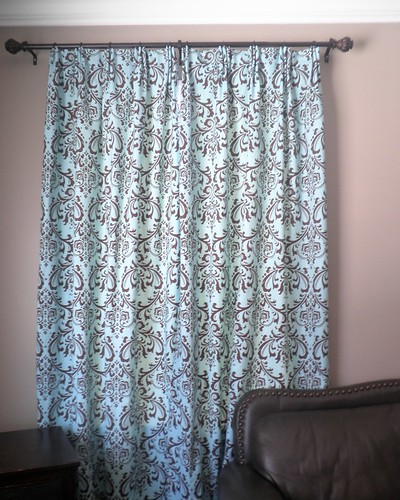
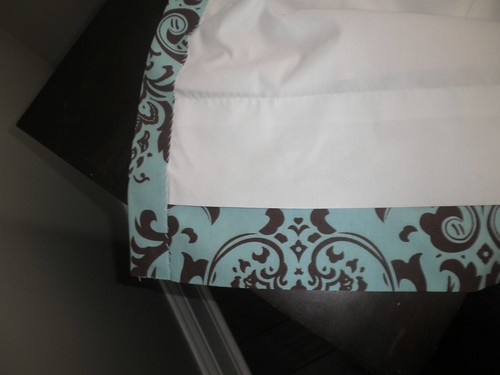
I also have been busy getting our front hallway done up in time for halloween.  To the left of the picture below, I made a coat rack which also serves as a photo ledge. The top of the ledge is made from door jambs which has ridges cut out which is perfect for putting pictures onto. I then stained it all in dark walnut. The curtain was a new addition to the front hallway. Now none of our neighbours can see in our house!

IMG_1254

Friday, September 27, 2013

Sew - sew - sew! Fair's a coming!

Dh has been bugging me for the past couple of years to enter some of my sewing projects into the fair, so this year I entered 5 items (to make up for all the years he's been bugging me to enter!) 

Ottobre 5/2012 #1 - first place winner
IMG_1168

here is my version of the tunic! I shortened it quite significantly - 5 inches - yes 5 inches - I guess I'm a little bit short - lol. Anyways this tunic falls just below my bum and when paired with knee high boots and leggins - it will be oh so comfortable! I used a lightweight navy linen that I purchased from fabric.com a few years ago. I also left off the pockets and zipper. I then handstitched the bottom and neck facing using white jean thread! I love this top and for less than 10$ I have a one of a kind top! A couple of months ago I also purchased a whole bunch of sewing machine feet from ebay (finally after years of having just the feet that came with my janome). One of those machine feet was a ruffler foot. I think I paid $12.00 or so for it but I can see why people like this foot and it came in mighty handy for doing this project. I enter this into our local fair and it won 1st place and a  $25 gift certificate to fabricland!

Ottobre 1/2011 #13 - Ruffled skirt (denim - centre top front) First place winner

IMG_1191

This skirt was my first ever separating zipper! The pattern is a great pattern only I think that the waistband really should have included an adjustable waist. and when I was doing the waistband facing I should have used white bobbin thread not navy blue! The next project that I do, I'm planning on using a double sided fusing tape to hold the inner facing seam allowance down so i cant topstitch the outer facing with precision - hopefully this makes the facing look cleaner.

Create Kids Couture - Elena's twirly peasant dress - with short sleeves - First place winner!
I love this pattern! It's simple and easy with a dramatic finished look! all the ruffles were hand done :/ as I hadn't received my ruffler foot yet.
I loved this pattern so much I decided to make it for my niece in less dramatic colours and entered it into a different category. It won 2nd place
IMG_1192

Ottobre 5/2010 #6 (first place)

IMG_1163
This pattern was a challenge to sew. it started with the placket - the directions for sewing it seems so confusing that i just winged it and turned the corners more rounded then square. i know i clipped them wrong but for the life of me i can't figure out how i was supposed to do it. then of course the facing was a nightmare - facings i just can't master yet! I ended up hand stitching the inner facing then top stitching from the front!

I am really happy with the results and plan on entering again next year!

Monday, July 29, 2013

Angry bird pjs

Its been over a year since i've sewn anything for the boys but I'm happy to finally have a sewing room backds#1 has been asking for a new pair of pjs for at least 6 months now (ever since the start of the attic reno) so when I told him he could design his own pjs he was ecstatic - of course I had to make ds2 and ds3 a pair too - I found the angry bird online for free and then just formatted it have two of them. These pjs took me almost 2 weeks to make (because dd4 won't go to bed any earlier than 10) but the smiles on my sons faces when they realized they have a ''pee-pee hole" was priceless, it had them in stitches for over 1/2 hour saying mama look at my dingle dangle. I used ottobre 6/2010 #14 for the pants and #18 for the shirts leaving off the sleeve overarm patch because i wanted to use my binder for the neckline - i hate working with this rib knit in my coverstitch machine using my binder - the first time i thought it was just inexperience in using the machine but now I think it's the fabric - i guess that what you get for buying it in the clearance section and not knowing the content of the fabric.

P7290270

ottobre 6/2010 angry bird pjs

Wednesday, July 17, 2013

Threading a Consew 75T blind hemmer / blind stitch machine

Back in December I purchased a blind stitch machine. Now some maybe wondering why on earth I would need another machine for blind stitching when my sewing machine already has a blind hem stitch on it. Well at the time of making my curtains I practiced on scrape fabric to see if in fact my domestic machine would be able to sew through the layers - as I suspected it wouldn't as with any domestic you have to flip over the fabric in order for it to do a blindhem stitch - I could have done it by hand but we were talking about yards of blind heming here and I wasn't up for the that. So I purchased the consew 75t for $100. For the price, I love the machine - it wouldn't go over the extremely bulky parts of my curtains (double folded and interlined and lined ) but I knew that when I purchased it, so i just did these parts by hand. So the difference between a true blind hem machine /stitch machine is that it only uses one thread to make a blind hem instead of the domestic machine which uses the thread and a bobbin thread. A domestic sewing machine stitches 3 straight stitches then a zig-zag.  This one difference makes ripping it out extremely easy and it looks way more professional in my opinion. If I didn't have so many layers I probably would have just used my sewing machine but I do love my blind hem machine and wouldn't give it up - as for anything sewing related - professional results are achieved with the right tool for the job.

blind hem sides

Here is a quick video of how to thread the machine too!


Wednesday, May 15, 2013

Sewing and woodworking

So I'm not the best blogger out there but I have good reasons. We are expecting our fourth child soon and we have been hard at work getting ready for her. Yes I said it - it's a GIRL - finally after 3 boys - I'm so excited to get to sew some girl clothes now. So we have been hard at work finishing off the attic so that we could move all my crafting stuff out of the spare bedroom - so that we could fix the cottage cheese textured walls, build a closet and refloor the roof. This house is a labour of love....and heartache.  Renos aren't fun! especially when you have so much to do and very little time to do it. Dh is soooo stressed and I'm stressed because I can't do as much as I'd like being pregnant.  Anyways in the last 3 months I've finished off the curtains in the family room - wow what a task that was.


family room curtains

Don't you love the toys in the toyroom! I love how they migrate into the family room within mins of the kids being up :) Anyways they are done and I am so happy with the results. They definitely keep the drafts out. Here's another angle of the room - o how I love this room! 

family room curtains

I have to shamefully admit that I haven't done a ton of sewing this past year but that because there really  wasn't a great spot for it - the spare bedroom had everything in it but other things around the house had to be done before I could get back to sewing. In the process I learnt how to build furniture. So when it was time to furnish the attic (my new sewing room) I wanted to build everything, mostly because I couldn't afford the price of custom as the attic stairs are steep as steep can get. Dh thought I was nuts but he soon realized I CAN DO IT, YES I CAN! So here's what the attic looked like when we bought this house.

attic
After the walls, insulation and floor were in.


P4080003

P4080004

P4080005

Here's one of the two fabric storage cupboard I've been building, it has wood centres now though. I just looking for the perfect door knobs. I got the plans from ana white's website.

IMG_0648

here's my 3 machine tables and cutting table.


IMG_0633

Tonight I got everything primed and tomorrow will be painting it all. It's almost done. Although it could take a few more week until after baby is born, to finish the stain part.

Wednesday, January 2, 2013

Family Room Curtains - In progress

As I've mentioned before, dh and I bough a fixer upper! It was (and is still) in need of some renovations . The family room as come along way since we moved into this house in May. All that is left are curtains and pictures / interior decorating. This room is actually huge - it's difficult to see in the pictures but it's 14 feet x 20 long. All of the windows are different heights  and the ceiling are 10 feet tall.  Here's what the family room looked like before - dated and in serious need of some tlc.

virtual-tour-50025-20-1299590042-enlarge
(here's the NE view of the room)
virtual-tour-50025-19-1299590042-enlarge
(NE and S views of room - N room is the sunroom)

virtual-tour-50025-21-1299590043-enlarge
(NE view of room)

virtual-tour-50025-23-1299590045-enlarge
(S view of room)
The wood panelling and carpet were the first to go. We then added a small powder room to the left of the door. Hardwood floors were added instead of carpet (as I despise carpet immensely with little kids and dogs) as well as crown moulding and newer baseboards that matched the old baseboards in the rest of the house. The walls were in desperate need of repair and wallpaper chair- rail were removed. The only problem with this room is it's shear size and that all the windows in it are completely different sizes. So I decided to make all the drapes 98'' (based on the tallest window) to give it a little bit of symmetry and uniform look. The drapes are made with home dec outer fabric, double napped interlining and drapery lining on the backside. I attempted to blind hem stitch these with my domestic home sewing machine but was dis-satisfied with the results. The drapery lining was puckering and looked awful from the backside. So I bit the bullet and invested in a portable blind hem machine.  I got a Consew 75T blind hemmer off ebay for $214 shipped to my United States address as a Christmas present from my dh. Why I went to this extreme just to make curtains - well truth be told we have over 30 windows in our house and making interlined curtains is a heck of a lot cheaper than buying them. The curtains I made for the windows in the family room alone based on the size of the windows and interlining, I checked on Sears website and they were a whooping $1300 each panel - that $2600 each window or $7800 for all the windows - I assume because I wanted them interlined - mainly to keep the drafts out of this place not that there are many but it is after-all an old house and new windows aren't in the budget right now - although for the cost of the curtains I priced at Sear, I'm sure new windows are cheaper than buying curtains. 
Anyways, I'm really pleased with my new blindhemmer machine - it doesn't go over the really thick areas with the double folds of home decor fabric and linterlining and lining altogether, but I knew this when I purchased it as it is a lighter weight machine. I just hand stitched those areas. Eventually, I plan on opening a small home based sewing business to sew home decor and basic alterations so this machine will come in handy - if I get bigger and new a more industrial blindhemmer than I will buy it them but for now this works for me and for the price I couldn't go wrong. There was only one thing I did off the book - and that was I used pennies for my drapery weights instead of buying them - I know they were only $2.00 for 4 at fabricland but I only paid 6 cents per panel and no one know they are there anyways.
So here is one of the 3 windows finished, please also keep in mind that these are my first curtains I've ever made (yes honestly) and I really love how they turned out.) They are triple pinch pleated drapes.

P1020136

P1020137
(blind hemmer stitching - Oh doesn't it look so professional)

P1020138
(bottom hem - yes it's only a single fold but I really don't care that it's not double - know one but me will notice)